Program Applications
How to accept public applications from prospective mentors and mentees. A MentorStack help center guide for program admins.
Invitations work well when you already know who should join your program. Program Applications flips that: it gives you a public link where prospective mentors and mentees can apply on their own, without you inviting them first. You review every application before anyone joins. Nothing is automatic.
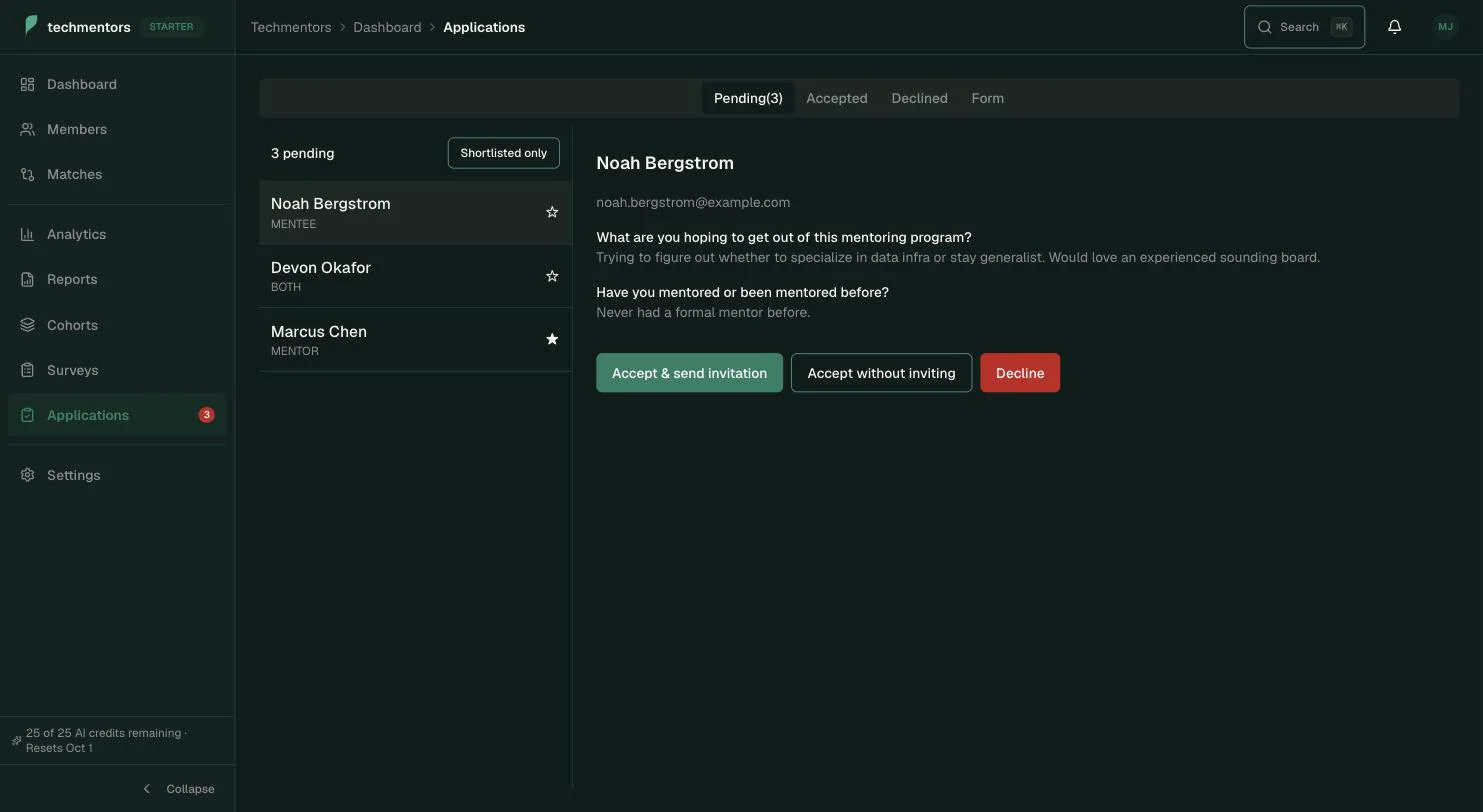
Turning On the Public Application Link
Program Applications is off by default, even on a paid plan. You have to turn it on explicitly. This is intentional: it's a public, unauthenticated form, so nothing should go live without you choosing to publish it.
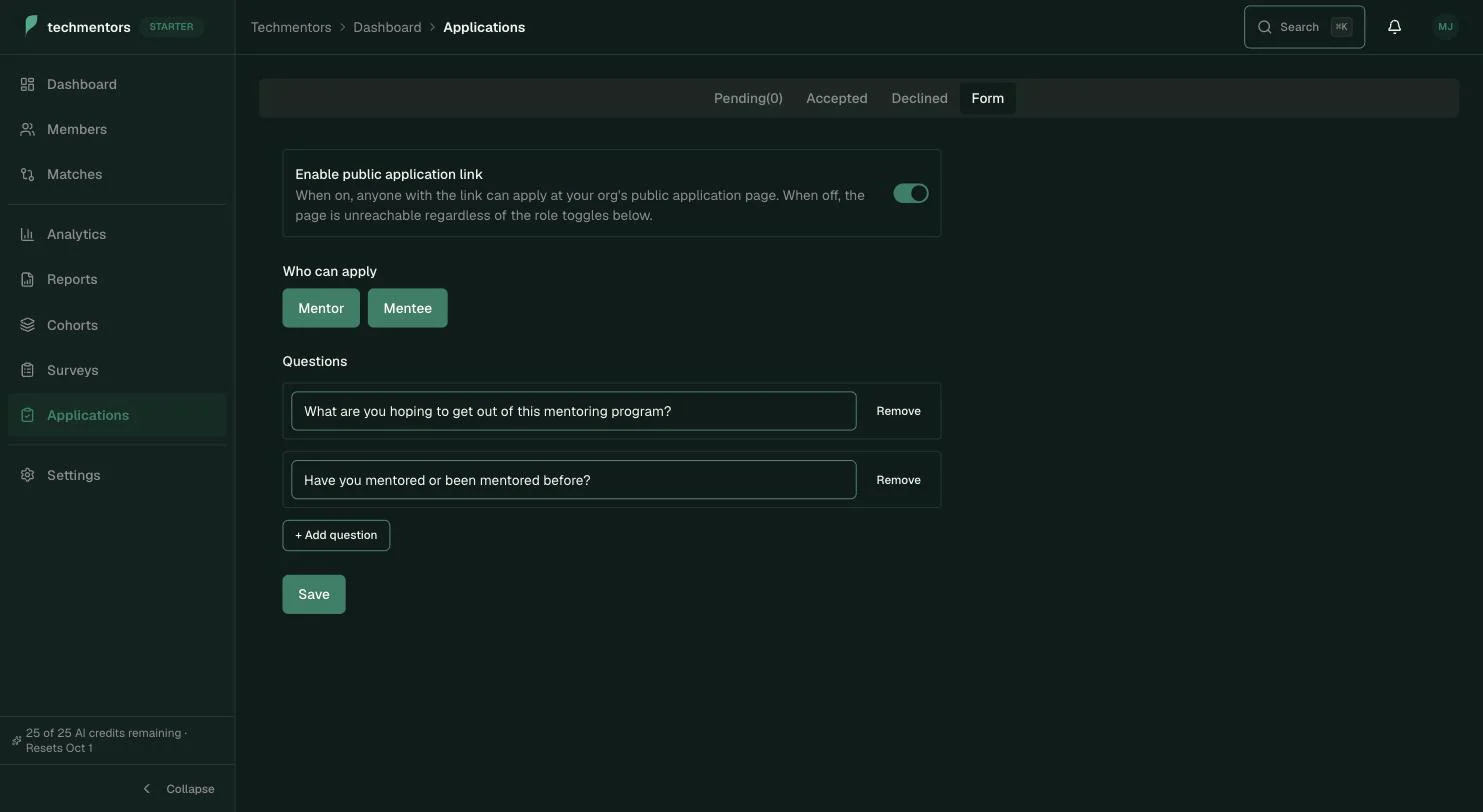
- Go to Dashboard → Applications and open the Form tab.
- In Who can apply, turn on Mentor, Mentee, or both. At least one must stay on.
- Turn on Enable public application link.
- Your application form is now live at
app.mentorstack.co/apply/your-org-slug. Share that link anywhere: careers page, Slack, an email signature, a job posting.
Tip
Turn the public link off any time without losing your question list or any applications already submitted. It only stops new submissions from coming in.
Building Your Application Form
Beyond name, email, and role, you can add your own questions, up to 20. Each question can be marked required or optional.
- In the Form tab, click Add question.
- Write the question text.
- Toggle Required if an applicant must answer before submitting.
- Drag a question by its grip handle to reorder the public form. Remove questions as needed, then click Save.
Each question has a type: Free Text, Multiple Choice, Yes / No, Rating (1-5), or NPS (0-10). All five render correctly to applicants, matching option list, rating scale, or NPS control included.
Reviewing Applications
Every submission lands in the Pending tab with the applicant's answers attached.
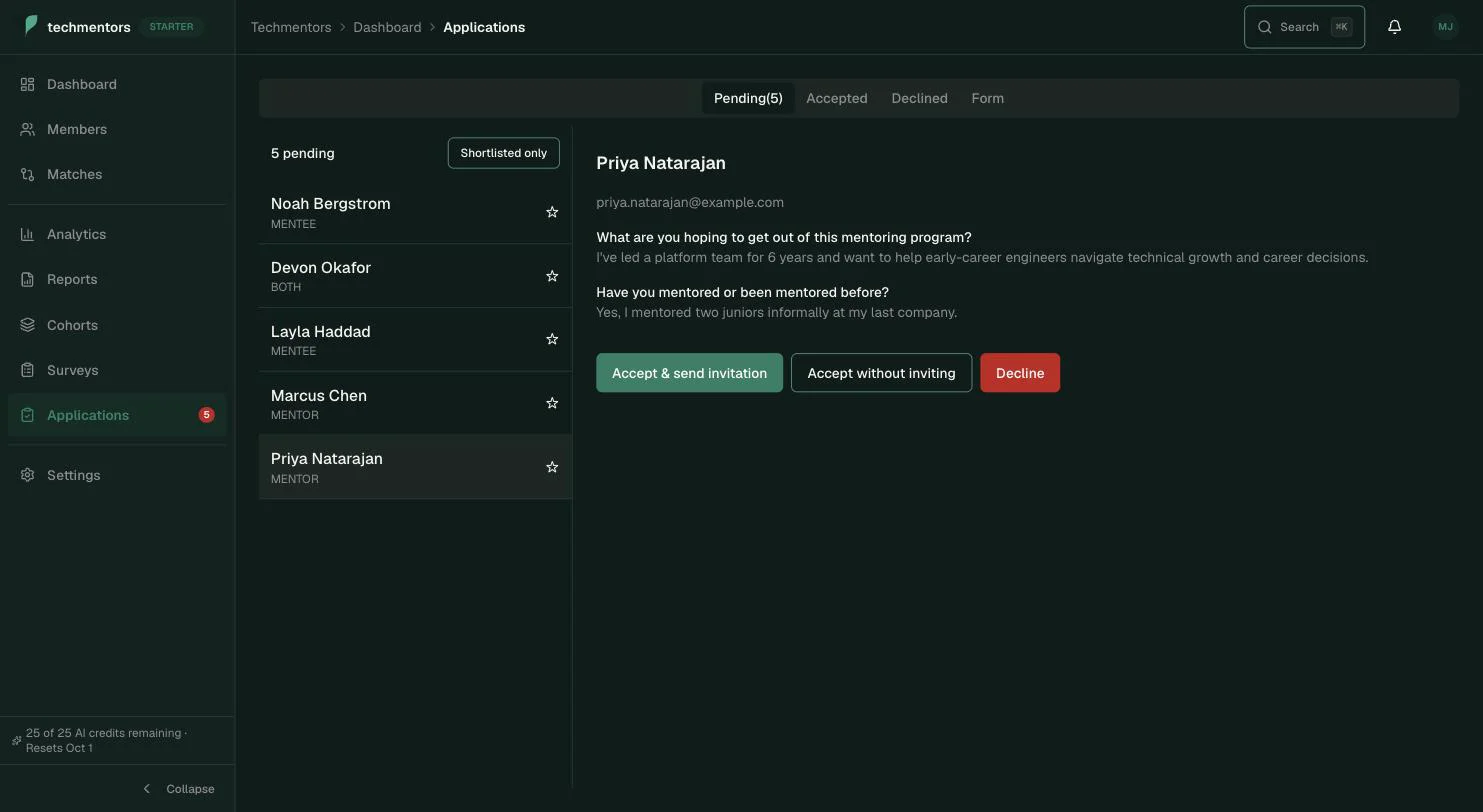
- Shortlist an application (the star icon) to flag it for a closer look. This works in any tab and doesn't affect the accept/decline decision.
- Accept moves the application to the Accepted tab. You can accept with an invitation (sends the applicant a real invite email immediately) or without, which is useful if you want to accept a batch first and invite later once you've decided on cohort placement or seat availability.
- Decline moves it to the Declined tab, with an optional reason you can note for your own records.
Inviting an Accepted Applicant Later
If you accepted without sending an invite (or an invite couldn't go out, for example because your org was at its seat limit), the application sits in Accepted with a Send Invitation action available. Use it once you're ready; it goes through the same invitation pipeline as inviting someone directly from the Members page.
Changing Your Mind
You can move a Declined application (or an Accepted one you never invited) back to Pending using Reconsider. Once an invitation has actually been sent for an application, though, it can no longer be reconsidered. At that point, manage the invitation itself from the Members page (resend, revoke) the same way you would for any other invite.
Plan Availability
Program Applications is available on Starter and above. On the Free Pilot, the Applications page shows an upgrade prompt instead of the review queue.
See the Program Applications feature page for an overview you can share with the rest of your team.